Unlock 5-Star Homemade Bread: Your Easy Path to Bakery-Quality Loaves
Imagine the irresistible aroma wafting through your kitchen, the soft crumb of a warm slice, and the golden crust that crackles just so. That's the magic of homemade bread, and it’s a culinary delight often considered reserved for seasoned bakers. But what if we told you that achieving a truly 5-star loaf, one that rivals any artisan bakery, is not only simple but also surprisingly quick? This comprehensive guide will demystify the bread-making process, transforming you into a confident baker, whether you're a complete novice or looking to perfect your technique.
For many, the idea of baking bread from scratch seems daunting, yet the foundational recipe is remarkably straightforward, requiring just a few basic ingredients: water, flour, yeast, a touch of sugar, salt, and oil. In about two hours, from start to finish, you can have two glorious loaves cooling on your counter, ready to be devoured. This isn't just any recipe; it's a beloved method lauded by thousands for its foolproof results, producing a light, fluffy, and flavorful bread that's truly unmatched.
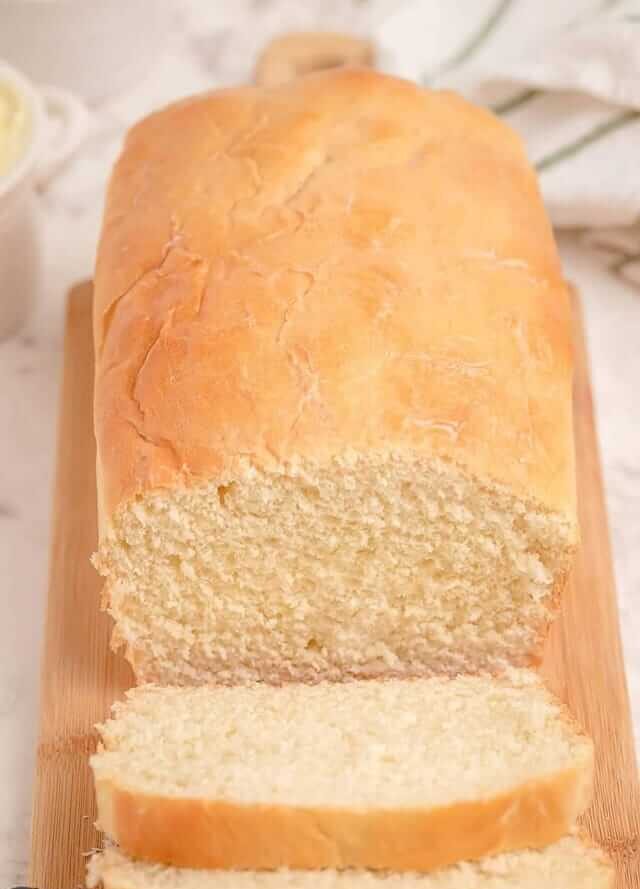
There's nothing quite like a warm slice of fresh homemade bread, served simply with a thick pat of butter. The experience transcends mere eating; it's a moment of comfort, tradition, and pure satisfaction. This recipe is not just easy to follow, but also incredibly versatile, allowing for simple adaptations like incorporating whole wheat flour for a heartier texture. Get ready to impress your family and friends – and most importantly, yourself – with the incredible taste of bread made with your own hands.
The Essential Ingredients for Your Best Homemade Bread
Before you even think about mixing, let's gather our simple yet powerful cast of ingredients. Each plays a vital role in crafting that perfect loaf of homemade bread. You likely have most of these in your pantry already, making this an accessible project for anyone.
- Warm Water: Crucial for activating the yeast. Think slightly warmer than lukewarm, around 105°F (40°C). Too hot will kill the yeast, too cold will slow its activation.
- Granulated Sugar: Not just for sweetness! Sugar provides food for the yeast, helping it to activate and thrive, contributing to a better rise and a tender crumb.
- Instant OR Active Dry Yeast: The leavening agent that makes your bread rise. Ensure your yeast is fresh and active for the best results.
- Salt: Essential for flavor, but also plays a role in controlling yeast activity and strengthening the gluten structure. Don't skip it!
- Vegetable or Canola Oil: Adds tenderness to the crumb, contributes to a golden crust, and helps with the dough's elasticity.
- All-Purpose Flour OR Bread Flour: The foundation of your loaf. All-purpose flour works wonderfully for a tender loaf, while bread flour, with its higher protein content, will yield a chewier, more structured bread. Feel free to experiment or even use part whole wheat flour for added nutrition and flavor.
That's it! With these simple components, you're well on your way to baking perfect homemade bread in just 2 hours.
Step-by-Step Guide to Baking Irresistible Homemade Bread
Let's dive into the practical steps that will lead you to a triumphant loaf of homemade bread. This process is broken down to be as clear and straightforward as possible.
1. Activating the Yeast (Proofing)
This initial step, known as proofing, is vital for ensuring your yeast is alive and ready to work its magic. It only takes about 5 minutes and gives you confidence that your dough will rise.
Combine your warm water (remember, around 105°F is ideal), the yeast, and 1 tablespoon of granulated sugar in a large mixing bowl. Give it a gentle stir and then let it sit undisturbed for 5-7 minutes. You'll know the yeast is active when it begins to puff up, forming a foamy layer across the surface of the water. This bubbly top indicates your yeast is alive and well, ready to make your bread light and airy.
2. Mixing the Dough
Once your yeast is bubbling with life, it's time to bring the rest of the ingredients into the fold.
Add the remaining sugar, oil, salt, and flour to the yeast mixture in your bowl. If you have an electric mixer with a dough hook, this part is incredibly easy; mix on low speed until everything is well combined and a shaggy dough forms, about 2 minutes. If you're mixing by hand, use a sturdy spoon or spatula until the ingredients come together into a coherent mass. Don't worry if it looks a bit rough at this stage; the magic happens in the next step!
3. Kneading for Texture and Structure
Many new bakers find kneading intimidating, but it's a crucial step that develops the gluten in the flour, giving your bread its signature texture, elasticity, and ability to rise beautifully. This is where your dough transforms from a sticky mess to a smooth, supple ball.
Using an electric mixer with a dough hook, knead the dough for about 7 minutes. If kneading by hand, turn the dough out onto a lightly floured surface and knead for 10-12 minutes. The rhythm of kneading—pushing, folding, and turning—builds those vital gluten strands. You'll notice the dough becoming progressively smoother, more elastic, and less sticky. A good test for proper kneading is the "windowpane test": carefully stretch a small piece of dough; if you can stretch it thin enough to see light through it without tearing, your gluten is well-developed.
4. The First Rise (Bulk Fermentation)
This is where patience pays off. The first rise allows the yeast to feast on the sugars, producing carbon dioxide that creates air pockets, developing flavor, and contributing to the bread's structure.
Lightly oil a clean bowl, then place your beautifully kneaded dough inside, turning it once to coat all sides. Cover the bowl tightly with plastic wrap (spraying the underside with a little oil helps prevent sticking) or a clean, damp kitchen towel. For an optimal rise, place the bowl in a warm, draft-free spot. If your kitchen is cool, a trick is to turn your oven on for 2-3 minutes, then turn it off and place the covered dough inside the slightly warmed oven. Let the dough rise until it has roughly doubled in size, which usually takes about 60-90 minutes, depending on the warmth of your environment.
5. Shaping and Second Rise (Proofing)
Once your dough has completed its first rise, gently punch it down to release the trapped gases. This helps create an even texture and makes the dough easier to handle.
Divide the dough into two equal portions. On a lightly floured surface, shape each portion into a loaf. A simple method is to flatten the dough into a rectangle, then roll it up tightly from one end to the other, pinching the seam closed and tucking the ends under. Place the shaped loaves into greased loaf pans, seam-side down. Cover the pans loosely with plastic wrap or a clean towel and let them rise again in a warm place for another 30-45 minutes, or until they have nearly doubled in size and look visibly puffy. This second rise, or proofing, gives the loaves their final lift and delicate crumb before baking.
6. Baking Your Golden Loaves
Preheat your oven to the recommended temperature, typically around 375-400°F (190-200°C).
Once the oven is hot and your loaves have completed their second rise, place them into the preheated oven. Bake for approximately 25-35 minutes, or until the crust is a beautiful golden brown and the internal temperature reaches 200-210°F (93-99°C) with an instant-read thermometer. For an extra touch of perfection, consider brushing the tops with melted butter immediately after removing them from the oven. This creates an even softer crust and adds an incredible richness. Your kitchen will be filled with the most intoxicating aroma!
7. The All-Important Cooling Stage
Resist the urge to slice into your Grandma's best homemade bread immediately! While tempting, proper cooling is absolutely essential for the bread's final texture and flavor.
Carefully remove the loaves from their pans and place them on a wire rack to cool completely, or at least until they are just barely warm. This allows the internal moisture to redistribute and the starches to set, preventing a gummy texture. Expect this to take at least 30-60 minutes. Slicing too early can result in a doughy, less enjoyable crumb. Once cooled, slice, slather with butter, and savor the magnificent result of your efforts!
Embrace the Joy of Homemade Bread
From the simple act of combining ingredients to the incredible reward of a warm, fragrant loaf, making homemade bread is an experience that nourishes both body and soul. This recipe proves that you don't need years of experience to create something truly spectacular. With clear steps, a handful of ingredients, and a little patience, you can consistently achieve 5-star bakery-quality bread right in your own kitchen.
So, clear your counter, gather your ingredients, and embark on this delicious journey. The unparalleled taste and comforting aroma of fresh homemade bread are just a few simple steps away. Welcome to the wonderful world of home baking!
